From the day I was given my first traffic signal, an 8 inch Marbelite, I was faced with my next challenge of finding a controller for it. As I said earlier, my dad's engineering friend added toggle switches to control the signal, but still it didn't function on it's own. Remember, this was ions before
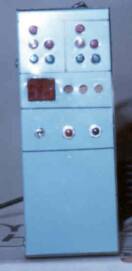
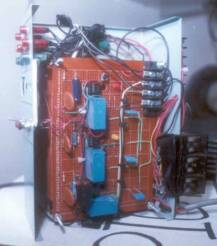
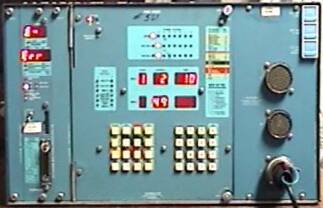
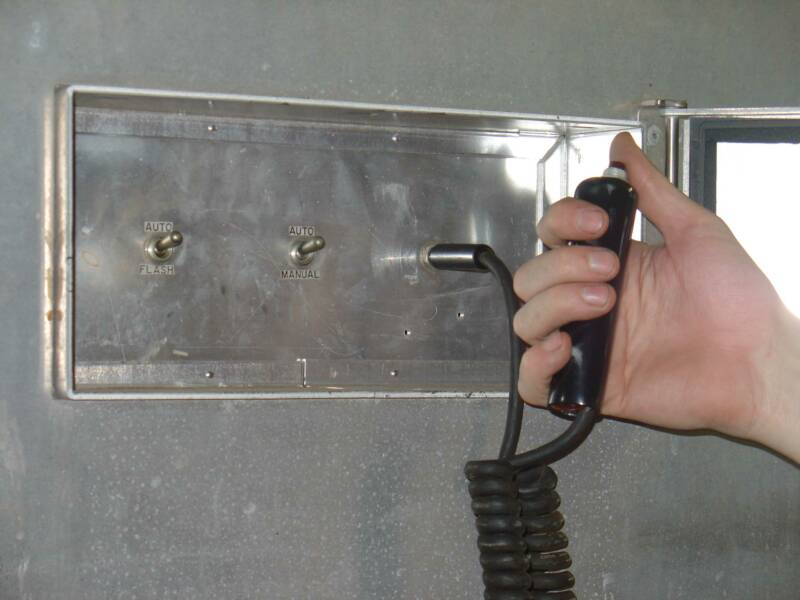
Lights to Go! was around, and since there was no other option, I decided to build my own controller that would control two opposing directions of traffic, along with two pedestrian signals. To the right is a picture of what I came up with. This is the very first controller that controlled my Marbelite. Inside of my controller box, is a digital controller consisting of parts bought from a local Radio Shack. Inside are two identical circuit boards. One for each direction of traffic. Basically it is a modified 555 timer circuit copied six times over. When you trigger the timer from a button located on the front of the unit, it starts counting and runs out. Then triggers the next timer, and then the next...and then resets itself. From the front of the box you could see what the lights were doing by the R/Y/G status indicator lights. You had red/yellow/green...and then directly beside it you had red and green lights indicating walk and don't walk. Also a digital numeric readout showed seconds left in the cycle. The readout part malfunctioned, so I shorted the LED's to read "On" when the unit was counting. All in all a nifty little box.

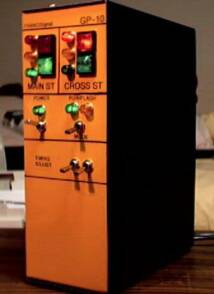
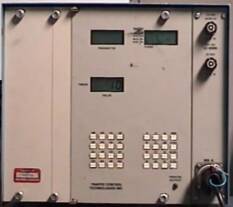
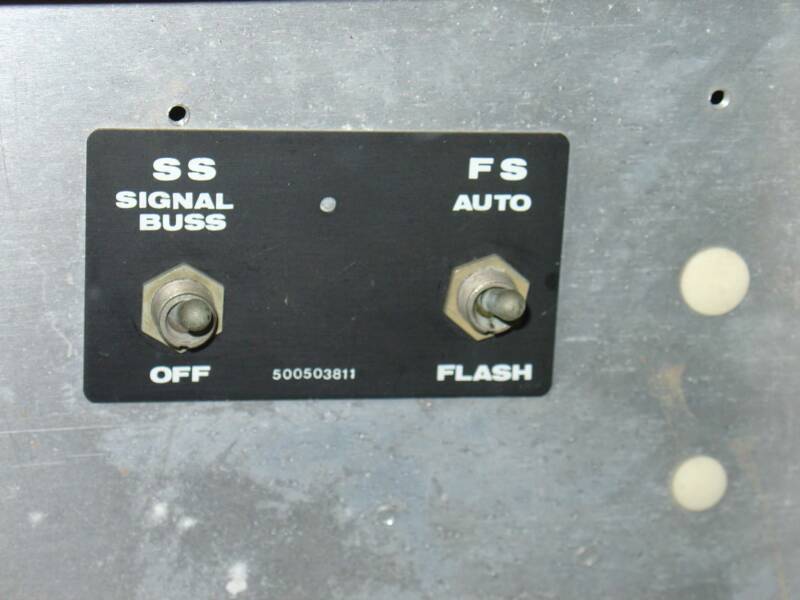
Here is a picture of my updated version of the blue traffic control box that I designed and built myself about 10 years later. I call it the "GP-10 Traffic Control Module" In part because it has a "Lights To Go" P-10 brain in it. The "G" in the name stands for George. Get it? "GP-10? Like it's predecessor, It controls two opposing lanes of traffic with their respective pedestrian signals. From the front panel I can monitor all of it's functions from light status, with it's neon indicator lights, to timing and flash modes. The box has two separate modes. Normal "RUN" mode, where the lights change at a predetermined timing cycle, accessible from the TIMING ADJUST toggle switches, and "FLASH" mode, where Main street flashes the amber signal, and Cross street flashes the red signal.
The inside of the GP-10 is basically that. A P-10 with a few of my external modifications for external switches and neon indicators.
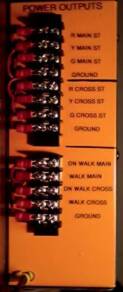
The back of the GP-10 is simply designed as well. Here we have all of the connections that go to the traffic signal heads. Everything is labeled. No confusion here of where things go!
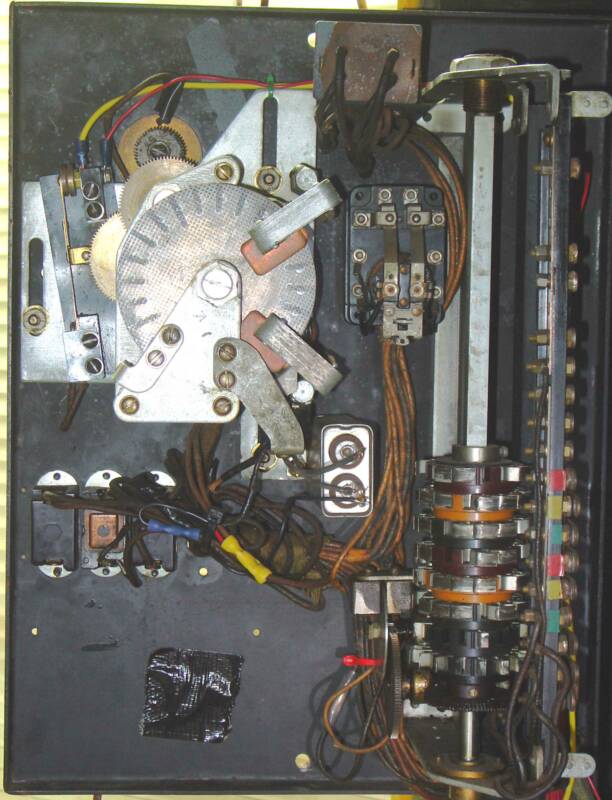
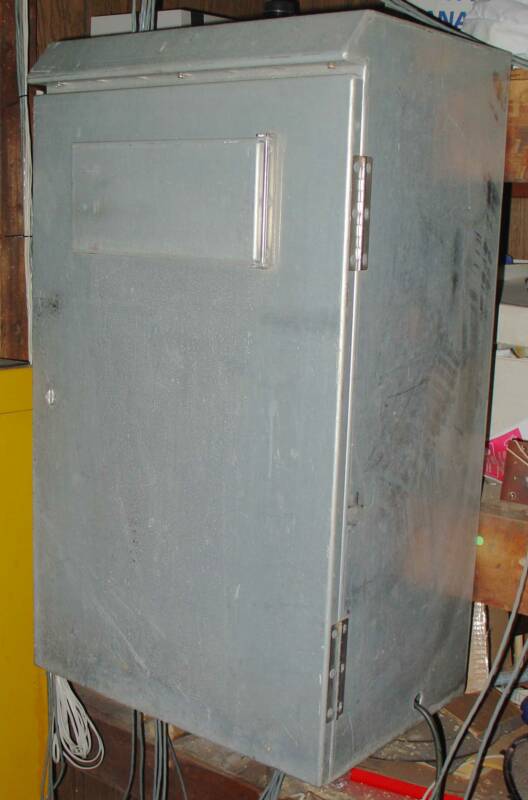
Here is a picture of my first real controller in my collection. It is a Crouse-Hinds GS-4 electromechanical controller. This is the box that matches my Crouse-Hinds 4-way signal. A working matching set! What luck! It was designed in the late 30's to early 40's. Inside, the time clock dial turns. To adjust the timing cycle, you remove and place the two silver clips to the cycle that is desired. The timing base is the big pointer which also moves around the dial. So the dial turns, and makes contact with the contacts down at the bottom, which triggers a motor that advances the cam which the lights are wired to. It is really amazing as well as just plain fun to watch! To the right, a picture of the inside of the controller. The timing dial is on the left, and the cam that rotates and changes the lights from green to yellow to red is on the right. What's also very neat about this box is it's ability to correct itself. If for what ever reason the cam doesn't fully engage to advance the light and it sticks on yellow, there is an "index" screw on the dial that tells it where "12:00" is and it purposely triggers the cams on the lower right, and resets itself on the next pass therefore correcting the light! Wow!....It thinks! A really great, well thought out design. Place your cursor over the picture to the left to see what the unit looks like inside.
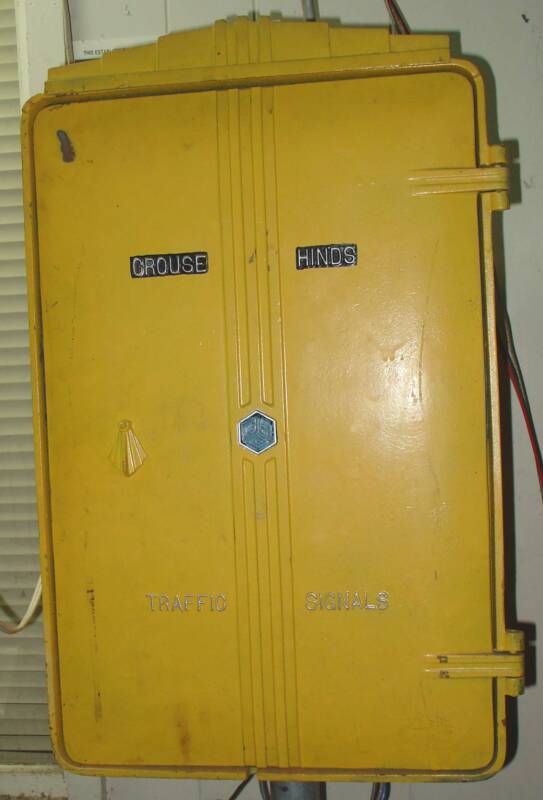
To the right is a picture of my second electromechanical controller in my collection. It is an Eagle EF-20. I have it set up for two phase operation with two pedestrian signals.
The EF-20 operates much in the same way as my Crouse-Hinds GS-4 EMC does. A motor turns a dial clock with keys on it and advances a cam to change the lights. It currently controls my Eagle 4-way non-adjustable signal. Place your cursor over the picture to the right to see what the unit looks like inside.
Below are pictures of my four NEMA Controllers.
I can interchange these controllers in my 2 NEMA cabinets.
Econolite KMC-8000
Above is a picture of an Econolite 8 Phase Controller in my collection. This controller came from a contractor in Baltimore, MD.
Traffic Control Technologies
LC 2000
Above is a picture of my TCT 2 Phase Controller, originally made by Crouse-Hinds. This controller came from Ohio D.O.T.

Econolite KMC-4000
Here is a picture of my KMC-4000. It is virtually identical to the KMC-8000, with two differences. Instead of 8 phases, it controls only 4. Also, it does not have the clock, day, date, year, telemetry expansion module. The Econolite KMC Series is a great workhorse of a controller. Ease of operation and programing are just two of it's great features!
Minnesota Microtronics II Model 800/8 8
And finally, my Minnesota Microtronics II. The fourth in my collection of NEMA controllers This is a Model 800/8 8 phase controller. This one comes in at a close tie with the Econolite for my favorite NEMA controller to program. I love the display on this one! It now resides in the 4 phase NEMA cabinet, operating a three phase set up with their respective pedestrian signals and protected left turn lane.
NEMA 4 Phase Cabinet
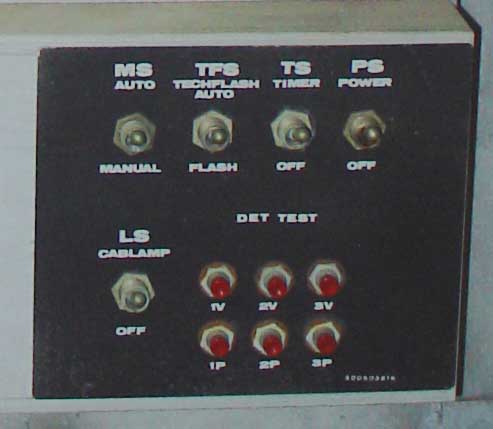
To the right, a picture of my NEMA 4 Phase cabinet. Complete with load switches and flashers and loop detector buttons. It is currently set up in a 3 phase configuration with protected left turn lane. It runs my Main Street/Cross Street Crouse-Hinds signals with their pedestrian signals, and my Eagle MARK IV Doghouse / Automatic LFE Combo with it's pedestrian signal. Needless to say, between the cabinet and the signals, there are miles of multiconductor cable! Not to mention inside the box as well! Inside on the top shelf is my Minnesota Microtronics 800/8, 8 phase controller. Currently I have only 4 phases enabled. On the door, are the three preemption buttons for the 3 phases and left turn lane. They act just as a loop detector does in the street. You press the button and it puts in a call to the controller for that street to change the lights. There is also a nice electrical outlet for test equipment or soldering iron. Then there are manual function switches for power and flash modes. The cabinet has a built in fluorescent light at the top, and also a fan that has an adjustable thermostat on it! It comes on at a preset temperature to cool down the cabinet. On the front, is the police door with two switches in it. One to put the cabinet in flash, and the other for manual or automatic mode.
PLACE YOUR CURSOR OVER THE PIC TO SEE INSIDE CABINET.
Police Panel
Tech Panel
To the right, a picture of my NEMA 2 Phase cabinet that I built from the ground up. The cabinet is made by GAMMATRONIX. The back panel was already inside and that was basically it. I rewired the back panel for two phase operation and two peds and added load switches, 2 channel flasher, and flash transfer relays. This cabinet controls my Eagle Durasigs with the Kentron LED Red Hand / Green Man ped signals. It can be manually controlled by the front police panel by means of a hand held push button.
PLACE YOUR CURSOR OVER THE PIC TO SEE INSIDE CABINET.
NEMA 2 Phase Cabinet
Police Panel
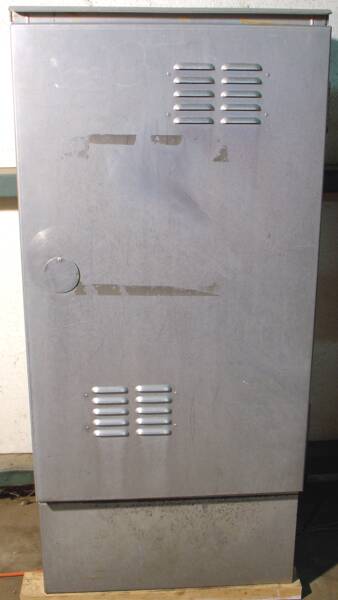
Here we have a picture of my Non-NEMA Pretimed 2 Phase cabinet. The cabinet used to have an electromechanical controller inside of it, but now it houses my Econolite KFT-1800 Electronic Controller. This cabinet controls my two way Econolite Long Groove Back signals with two ICC ped signals with Dialight LED inserts. PLACE YOUR CURSOR OVER THE PIC TO SEE INSIDE CABINET.
Econolite KFT-1800
This Crouse-Hinds flasher cabinet to the right flashes my GE 4-Way beacon. It used to be electromechanical, but as you can see, the box has been updated. Inside is my very own design. It is a modified 2 channel NEMA flasher, complete with separate switches for Power, Flash, and clear police light modes. Place your cursor over the picture to the right to see what the unit looks like inside.
Crouse-Hinds / NEMA Flasher
Crouse-Hinds GS-4
Eagle EF-20

Electromechanical Controllers
NEMA Controllers
Pre-NEMA Fixed Time Controllers
NEMA Flasher
Solid State Homemade Fixed Time Controllers
To the right is a picture of my third electromechanical controller in my collection. It is a Marbelite/GTE. I have it set up for two phase operation. It currently operates my Marbelite 3-Way cluster.
The Marbelite Controller operates much in the same way as my Crouse-Hinds GS-4 & EF-20 EM Controllers do. A motor turns a dial clock with keys on it and advances a cam to change the lights. Place your cursor over the picture to the right to see what the unit looks like inside.
Marbelite M-30
Marbelite M-30
Eagle EF-20
Crouse-Hinds GS-4
Econolite KFT-1800
Crouse-Hinds / NEMA Flasher
To the right is a picture of my fourth & most recent electromechanical controller in my collection. It is a 1959 Econolite Type "F" Electromechanical traffic controller. It is set up for two phase with peds operation. It currently runs two T-Con 8's and two ICC LED Man/Hand peds.
This Controller operates much in the same way as my Crouse-Hinds GS-4 & EF-20 EM Controllers do. A motor turns a dial clock with keys on it and advances a cam to change the lights. Place your cursor over the picture to the right to see what the unit looks like inside.
Econolite Type "F"
Econolite Type "F"
My Controllers
The Stoplight Zone
Click here to see a full restoration of a traffic signal!
Click here to go back to the MAIN MENU PAGE
and see other cool exciting stuff that I like to do!
Click here to see my traffic signals!
Click here to see rare antique traffic signal lenses in my collection!
Click here to see
other collector's sites!
Click here to see
My lights SEQUENCE!